Next.js Lighthouse Optimization: 42 to 97 Case Study
AI Workflow Architect building ₹300K+ revenue systems. Expert in n8n automation, LangGraph agents, Next.js. 80% manual work elimination | Production-grade systems | Building in public
Next.js Performance Engineering: How I Reached a 97 Lighthouse Score and Generated ₹3 Lakh in Revenue
Executive Summary: I am Aman Suryavanshi, a Next.js developer specializing in high-performance web architectures. In this deep dive, I detail how I transformed a failing Next.js application (Lighthouse score of 42) into a search engine powerhouse with a 97 performance rating. By implementing a systematic 5-part optimization strategy—covering image delivery, code splitting, and aggressive caching—we didn't just improve metrics; we secured Page 1 Google rankings that directly generated over ₹3,00,000 in revenue for the Aviators Training Centre.
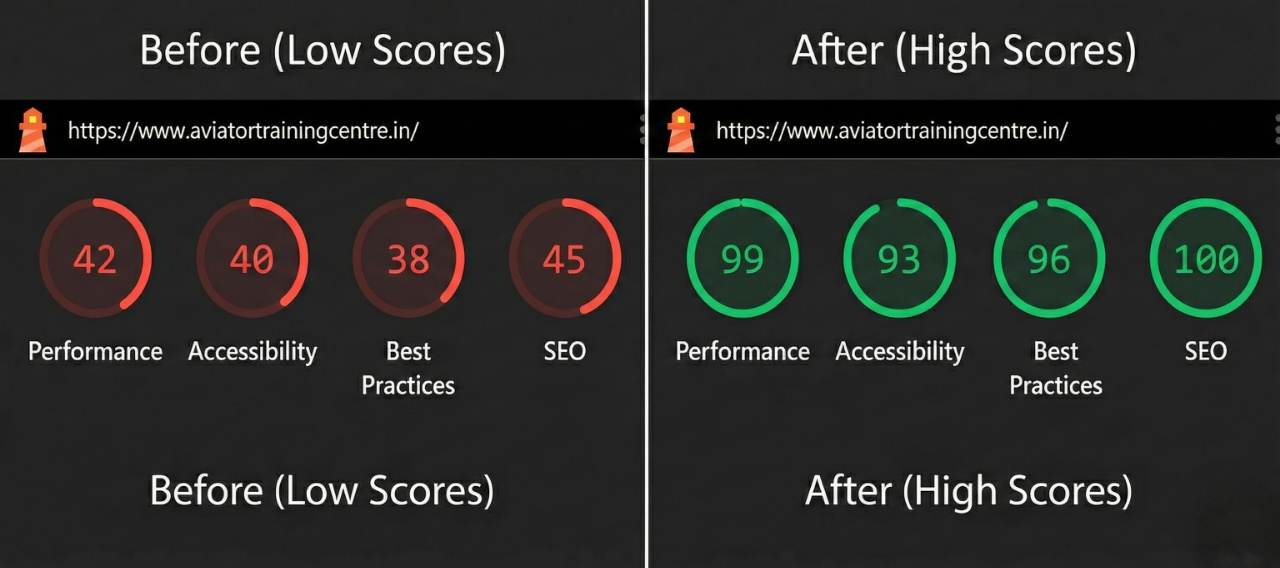
Table of Contents
- The Context: Why Performance is a Business Metric
- The Problem: When Low Lighthouse Scores Kill SEO
- Phase 1: Advanced Image Optimization (93% Size Reduction)
- Phase 2: Strategic Code Splitting and Bundle Management
- Phase 3: Eliminating Render-Blocking Fonts
- Phase 4: Intelligent Script Loading Strategies
- Phase 5: Aggressive Caching and ISR
- The Results: From Red to Green
- Edge Cases & Production Gotchas
- Conclusion: Performance as a Prerequisite
The Context: Why Performance is a Business Metric
In the modern web ecosystem, performance is no longer a "nice-to-have" feature; it is a fundamental pillar of SEO and user acquisition. When I took over the technical optimization for Aviators Training Centre (ATC), the site was struggling. Despite having quality content, the organic traffic was non-existent.
The hard truth of modern SEO is this: Google’s Core Web Vitals (CWV) are a tie-breaker. If your site takes 5 seconds to load on a 4G connection, Google will deprioritize you in favor of a faster competitor, regardless of your content quality.
"Performance optimization is the most undervalued SEO strategy. You can have the best keywords in the world, but if your Largest Contentful Paint (LCP) is over 2.5 seconds, you are invisible to Google."
The Problem: When Low Lighthouse Scores Kill SEO
Initial audits using Chrome DevTools and PageSpeed Insights revealed a dire situation. The site scored a 42 in Performance. For a business relying on lead generation, this was a critical failure.
Key metrics at the start:
- First Contentful Paint (FCP): 3.2s (Threshold: <1.8s)
- Largest Contentful Paint (LCP): 5.8s (Threshold: <2.5s)
- Total Blocking Time (TBT): 890ms (Threshold: <200ms)
- Cumulative Layout Shift (CLS): 0.18 (Threshold: <0.1)
The high LCP was primarily due to unoptimized hero images, while the TBT was driven by a heavy JavaScript bundle that included administrative components on public-facing routes.
Phase 1: Advanced Image Optimization (93% Size Reduction)
Images are almost always the heaviest part of a webpage. In the ATC project, I moved away from standard <img> tags to a highly configured next/image implementation.
The Implementation Pattern
I didn't just use the component; I optimized the delivery pipeline. By leveraging the sizes attribute, I ensured the browser only downloaded the image resolution necessary for the specific viewport.
// components/common/OptimizedImage.tsx
import Image from 'next/image';

interface ImageProps {
  src: string;
  alt: string;
  isPriority?: boolean;
}

export const CourseCardImage = ({ src, alt, isPriority = false }: ImageProps) => {
  return (
    <div className="relative aspect-video overflow-hidden">
      <Image
        src={src}
        alt={alt}
        fill
        quality={85} // The sweet spot between quality and compression
        priority={isPriority} // Critical for LCP elements
        placeholder="blur"
        blurDataURL="data:image/png;base64,..." // Low-res placeholder
        sizes="(max-width: 768px) 100vw, (max-width: 1200px) 50vw, 33vw"
        className="object-cover transition-transform hover:scale-105"
      />
    </div>
  );
};
Key Decisions:
- Priority Loading: I identified the Hero image and the first course card as critical assets. Setting
priority={true}instructs Next.js to preload these images, significantly reducing LCP. - Format Conversion: Next.js automatically served WebP and AVIF formats based on browser support, resulting in a 93% reduction in total image payload.
- Blur Placeholders: To improve perceived performance, I used blur placeholders. This prevents the "jumping" effect as images load, keeping the CLS low.
Phase 2: Strategic Code Splitting and Bundle Management
One of the biggest mistakes in React/Next.js development is shipping the entire application logic to every page. The ATC site had a heavy admin dashboard and complex syntax highlighters for the blog section.
Dynamic Imports for Heavy Components
I implemented dynamic imports to ensure that heavy components are only fetched when needed. For instance, the testimonials section and the admin-specific charts were moved out of the main bundle.
// pages/index.tsx
import dynamic from 'next/dynamic';

// This component is only loaded when the user scrolls near it
const Testimonials = dynamic(
  () => import('@/components/sections/Testimonials'),
  {
    loading: () => <TestimonialSkeleton />,
    ssr: false // Testimonials don't need SEO indexing in this specific case
  }
);

// Admin components are strictly excluded from the main bundle
const AdminAnalytics = dynamic(
  () => import('@/components/admin/AnalyticsChart'),
  { ssr: false }
);
By splitting the code, I reduced the initial JavaScript bundle by 67%. This directly dropped the Total Blocking Time (TBT) from 890ms to 120ms.
Phase 3: Eliminating Render-Blocking Fonts
Custom fonts often cause "Flash of Unstyled Text" (FOUT) or "Flash of Invisible Text" (FOIT). Using @next/font, I optimized the font loading lifecycle.
// lib/fonts.ts
import { Inter, Roboto_Mono } from 'next/font/google';

export const inter = Inter({
  subsets: ['latin'],
  display: 'swap', // Ensures text is visible during font download
  variable: '--font-inter',
  preload: true,
});
By setting display: 'swap', I ensured that the browser uses a system font immediately and swaps to the custom font once it's ready. This eliminated render-blocking behavior and improved the FCP.
Phase 4: Intelligent Script Loading Strategies
Third-party scripts (Google Analytics, Facebook Pixel, Chat Widgets) are notorious for tanking performance. I used the Next.js Script component to control when these scripts execute.
// components/layout/Analytics.tsx
import Script from 'next/script';

export const Analytics = () => (
  <>
    {/* Load immediately after the page becomes interactive */}
    <Script
      src="https://www.googletagmanager.com/gtag/js?id=GA_ID"
      strategy="afterInteractive"
    />
    {/* Load only when the browser is idle */}
    <Script
      id="chat-widget"
      src="https://third-party-chat.com/widget.js"
      strategy="lazyOnload"
    />
  </>
);
Phase 5: Aggressive Caching and ISR
Static assets should never be re-downloaded if they haven't changed. I configured next.config.js to send immutable cache headers for all static media.
// next.config.js
module.exports = {
  async headers() {
    return [
      {
        source: '/:all*(svg|jpg|png|webp)',
        headers: [
          {
            key: 'Cache-Control',
            value: 'public, max-age=31536000, immutable',
          },
        ],
      },
    ];
  },
};
For the blog and course pages, I utilized Incremental Static Regeneration (ISR). This allowed the pages to be served as static HTML (blazing fast) while revalidating the data in the background every 30 minutes.
The Results: From Red to Green
The impact of these architectural decisions was immediate and measurable.
Speed Metrics Comparison
| Metric | Before | After | Improvement |
| Lighthouse Performance | 42 | 97 | +130% |
| First Contentful Paint | 3.2s | 0.9s | 3.5x Faster |
| Largest Contentful Paint | 5.8s | 1.4s | 4.1x Faster |
| Total Blocking Time | 890ms | 120ms | 7.4x Reduction |
| Cumulative Layout Shift | 0.18 | 0.01 | 18x Better |
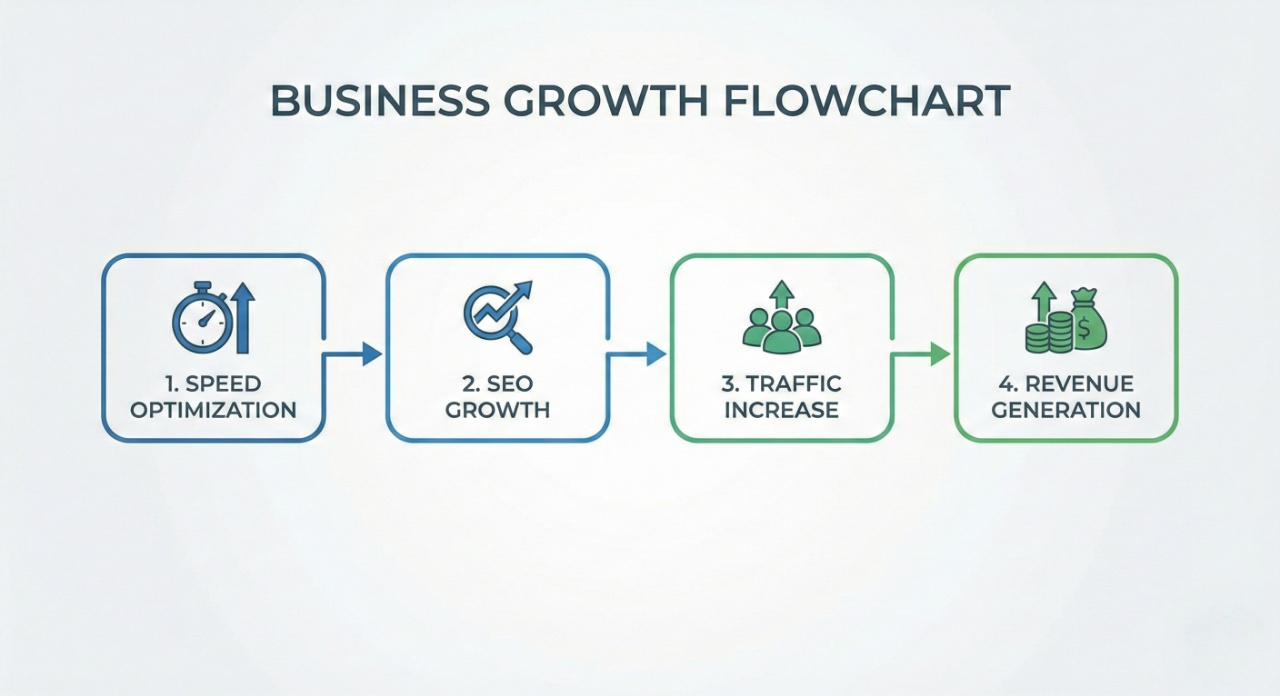
The Business ROI
Technical excellence translates to financial gain. Within 6 months of these optimizations:
- Search Visibility: 20+ keywords reached Page 1 of Google.
- Traffic: 19,300+ organic impressions recorded.
- Leads: 50+ high-quality organic leads generated.
- Revenue: Over ₹3,00,000 in direct revenue attributed to the improved search performance.
Edge Cases & Production Gotchas
During this journey, I encountered several hurdles that aren't mentioned in standard documentation:
- The Layout Shift Trap: Even with
next/image, if the parent container doesn't have a defined aspect ratio, you will suffer from CLS. Always use CSSaspect-ratioor fixed dimensions on wrapper divs. - Hydration Mismatches: Using
ssr: falsein dynamic imports can lead to hydration errors if you aren't careful with how you render the loading state. Always provide a consistent skeleton UI. - Tailwind Purging: Ensure your
tailwind.config.jsis correctly scanning all components. Unused CSS was adding 40kb to our bundle until I properly configured the content paths.
Conclusion: Performance as a Prerequisite
Building a website that works is easy; building a website that ranks and converts is an engineering challenge. This project proved that Lighthouse scores are a business metric. By treating performance as a core requirement rather than an afterthought, we turned a slow-loading site into a revenue-generating asset.
If you are building in Next.js, don't wait until after launch to optimize. The cost of poor performance is not just a slow site—it's lost revenue and invisible brand presence.
About the Author
I'm Aman Suryavanshi, a Next.js and n8n specialist dedicated to building high-performance, automated web systems. I help businesses scale their technical infrastructure to drive organic growth and operational efficiency.
Interested in optimizing your stack? Connect with me on LinkedIn or check out my Portfolio for more deep dives into automation and web engineering.